

Documentation
Word Exporter for ConfluenceBrowse
Documentation
Word Exporter for ConfluenceCover Page
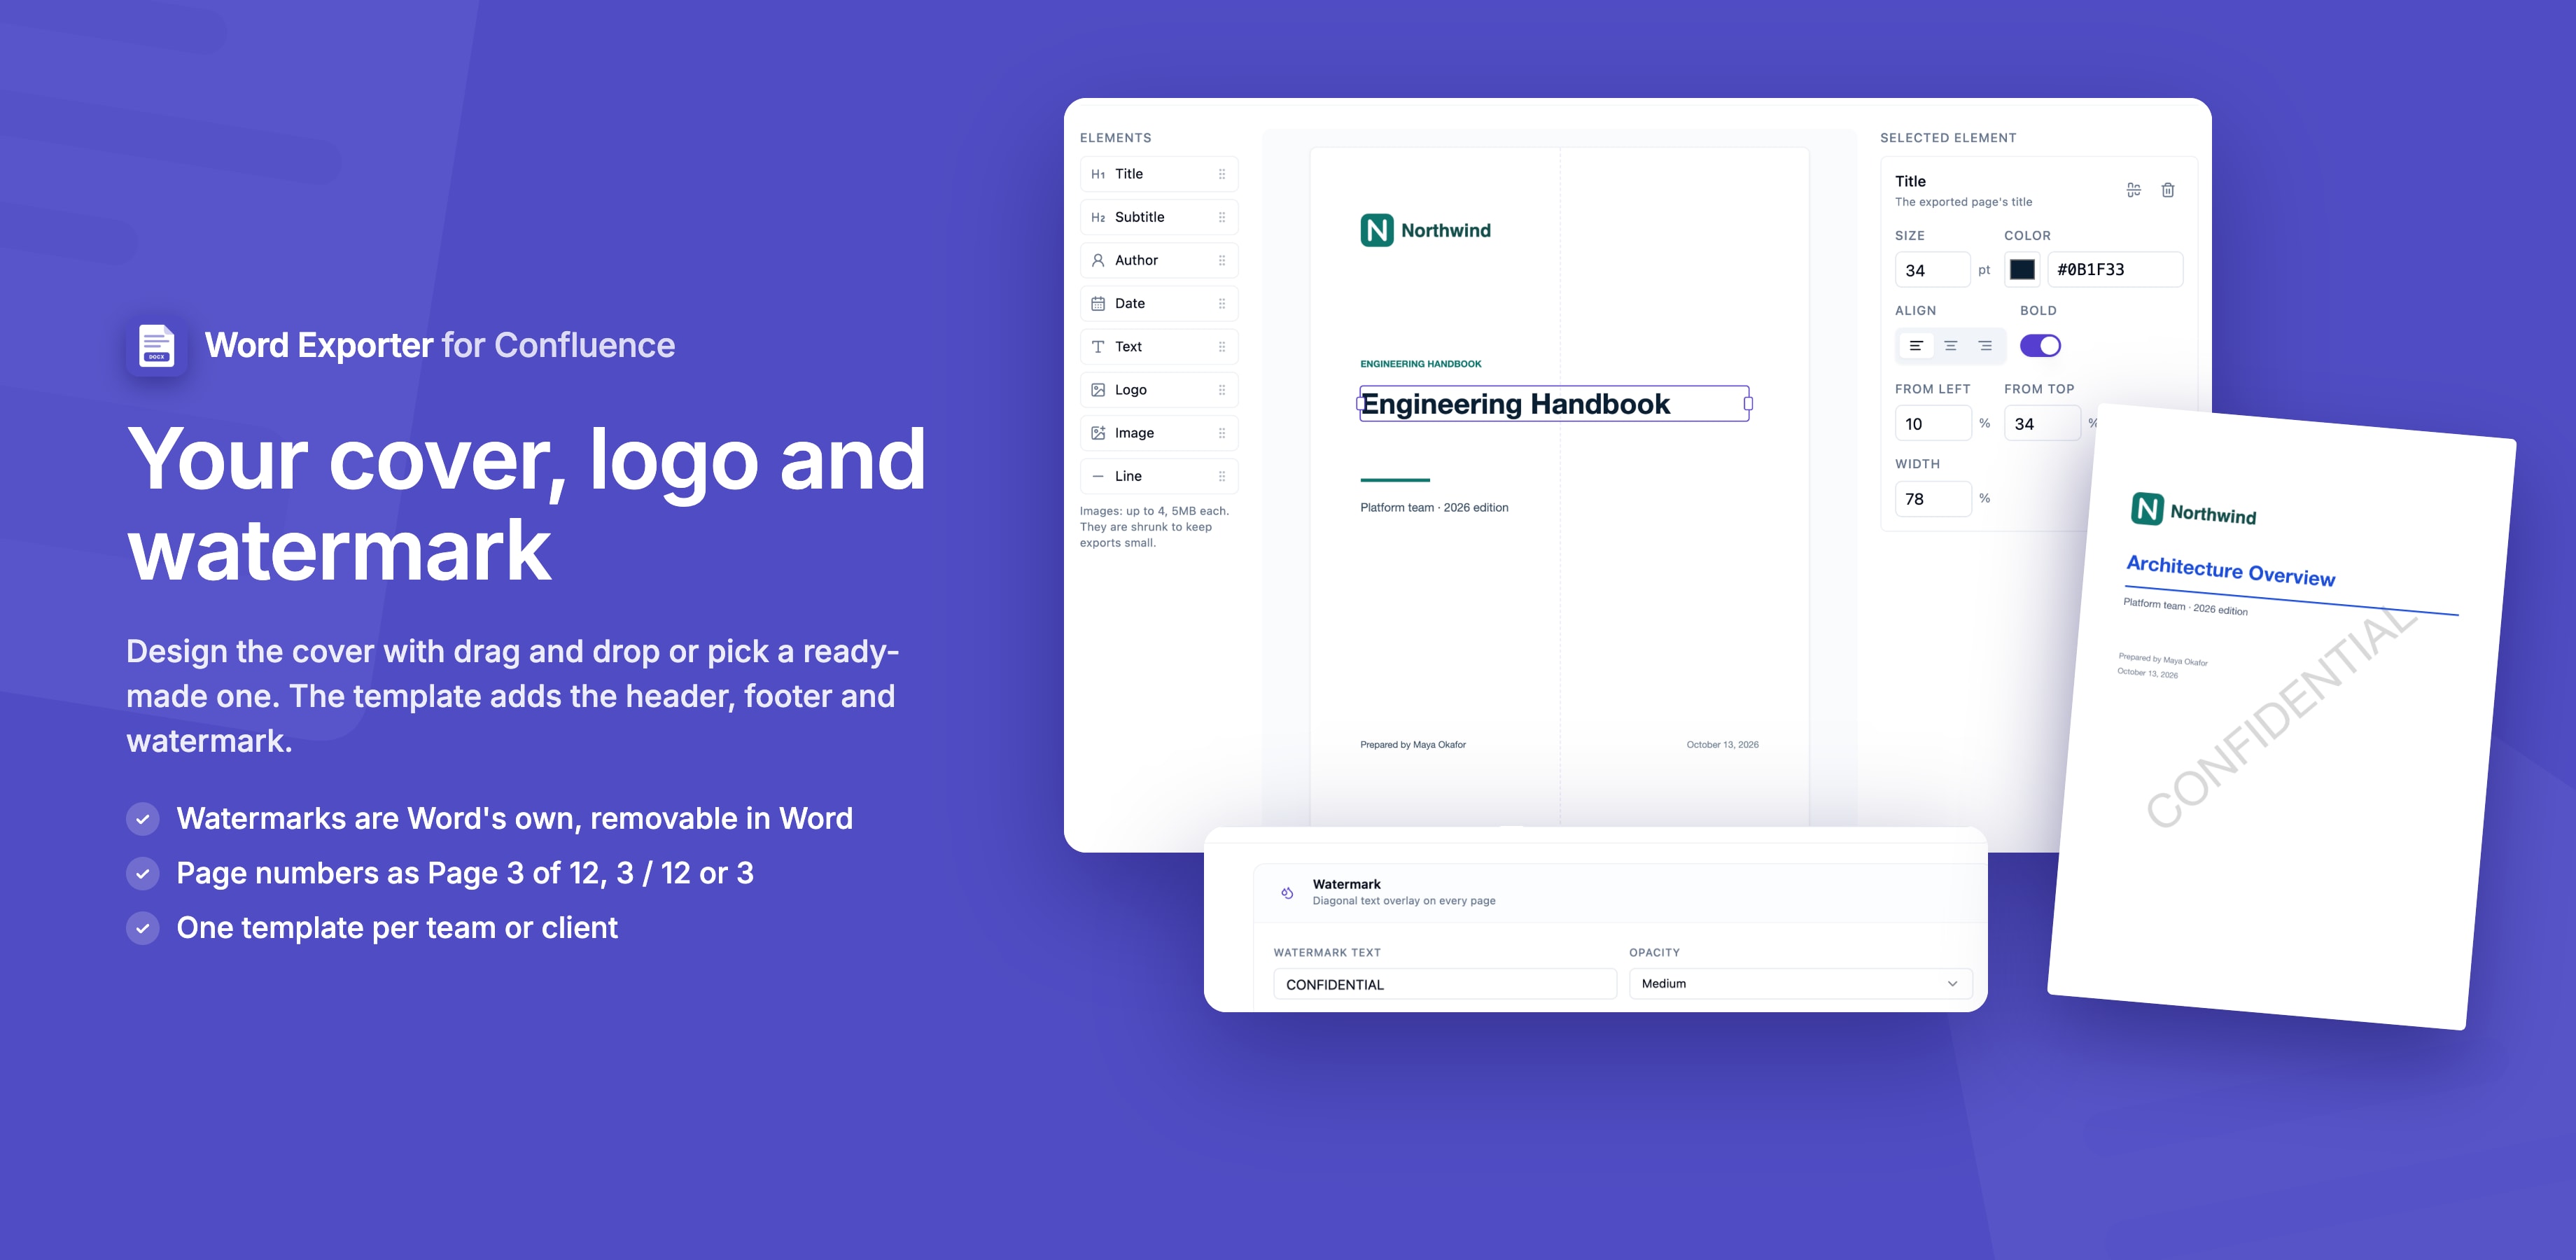
Add a title page to your Word exports. Pick a ready-made design, or design your own cover by dragging elements onto the page.
Enabling the Cover Page
The cover page is configured per template. To enable it:
- Go to Confluence Settings → Word Exporter
- Open a template to edit (or create a new one)
- Open the Cover Page section and turn on Add cover page
- Pick a design and customize it
- Save the template
Every export that uses this template starts with the cover page.
Ready-made Designs
Choose one of the ready-made designs from the tiles in the Cover Page section, or Custom to build your own layout in the cover designer (below). A preview updates as you change settings.
Designing a Custom Cover
Choose the Custom tile and the cover designer opens. Choosing it again, or the Edit design tile next to it, reopens the designer.
The designer has three parts:
- Elements: Title, Subtitle, Author, Date, Text, Logo, Image and Line. Drag one onto the page, or click it to add it.
- The page: shown at your template's page size and orientation, with the background image behind it.
- Selected element: the settings of the element you clicked.
Placing Elements
- Move an element by dragging it.
- Change its width with the handles on its left and right sides. Text wraps inside the box.
- Line things up: edges snap to the page centre and to the other elements, with a guide line while snapped.
- Nudge the selected element with the arrow keys; hold Shift for bigger steps. Delete removes it.
- Set exact values (distance from the left, distance from the top and width) in the settings panel.
Styling Elements
Text elements have a size, colour, alignment and bold setting. Lines have a colour and thickness. The Text element accepts variables such as {title}, {date}, {year} and {lastEditedBy}. Type { to pick one.
The Title prints each exported page's own title. Long titles wrap inside their box, so leave room below the title.
Undo and Starting Over
- Undo and Redo (
⌘Z/Ctrl+Z,⇧⌘Z/Ctrl+Y) - Discard changes puts back the layout the designer opened with
- Reset to default starts again from the default layout
Click Done to return to the template, then Save Changes.
Images on the Cover
Add the Image element, or drop an image file straight onto the page.
- Up to 4 images per cover
- PNG, JPEG, GIF or WebP, up to 5MB each
- Images are shrunk in your browser before they are saved, so templates and exports stay light. An image too detailed to shrink far enough is refused with a message.
Customization Options
Accent Color
Sets the colour of the decorative elements in the ready-made designs. The Custom design has no accent colour; each element carries its own.
Subtitle and Author
Optional text shown on the cover. Both accept variables, for example Prepared by {lastEditedBy}.
Logo
Upload a logo to show on the cover. In the Custom design, place it with the Logo element.
Background Image
A full-page image behind the cover, for any design.
Cover Page in the Export
The cover page is the first page of the Word document. In the preview of the Export to Word dialog you can check how the cover looks with the template before you download.
Tips
- Use Custom to match your company's brand guidelines exactly
- Check a long page title in the export preview to make sure it doesn't run into the element below it
Stuck on something this page does not cover? Ask the developers.