


.png&w=64&q=75)
The Editor
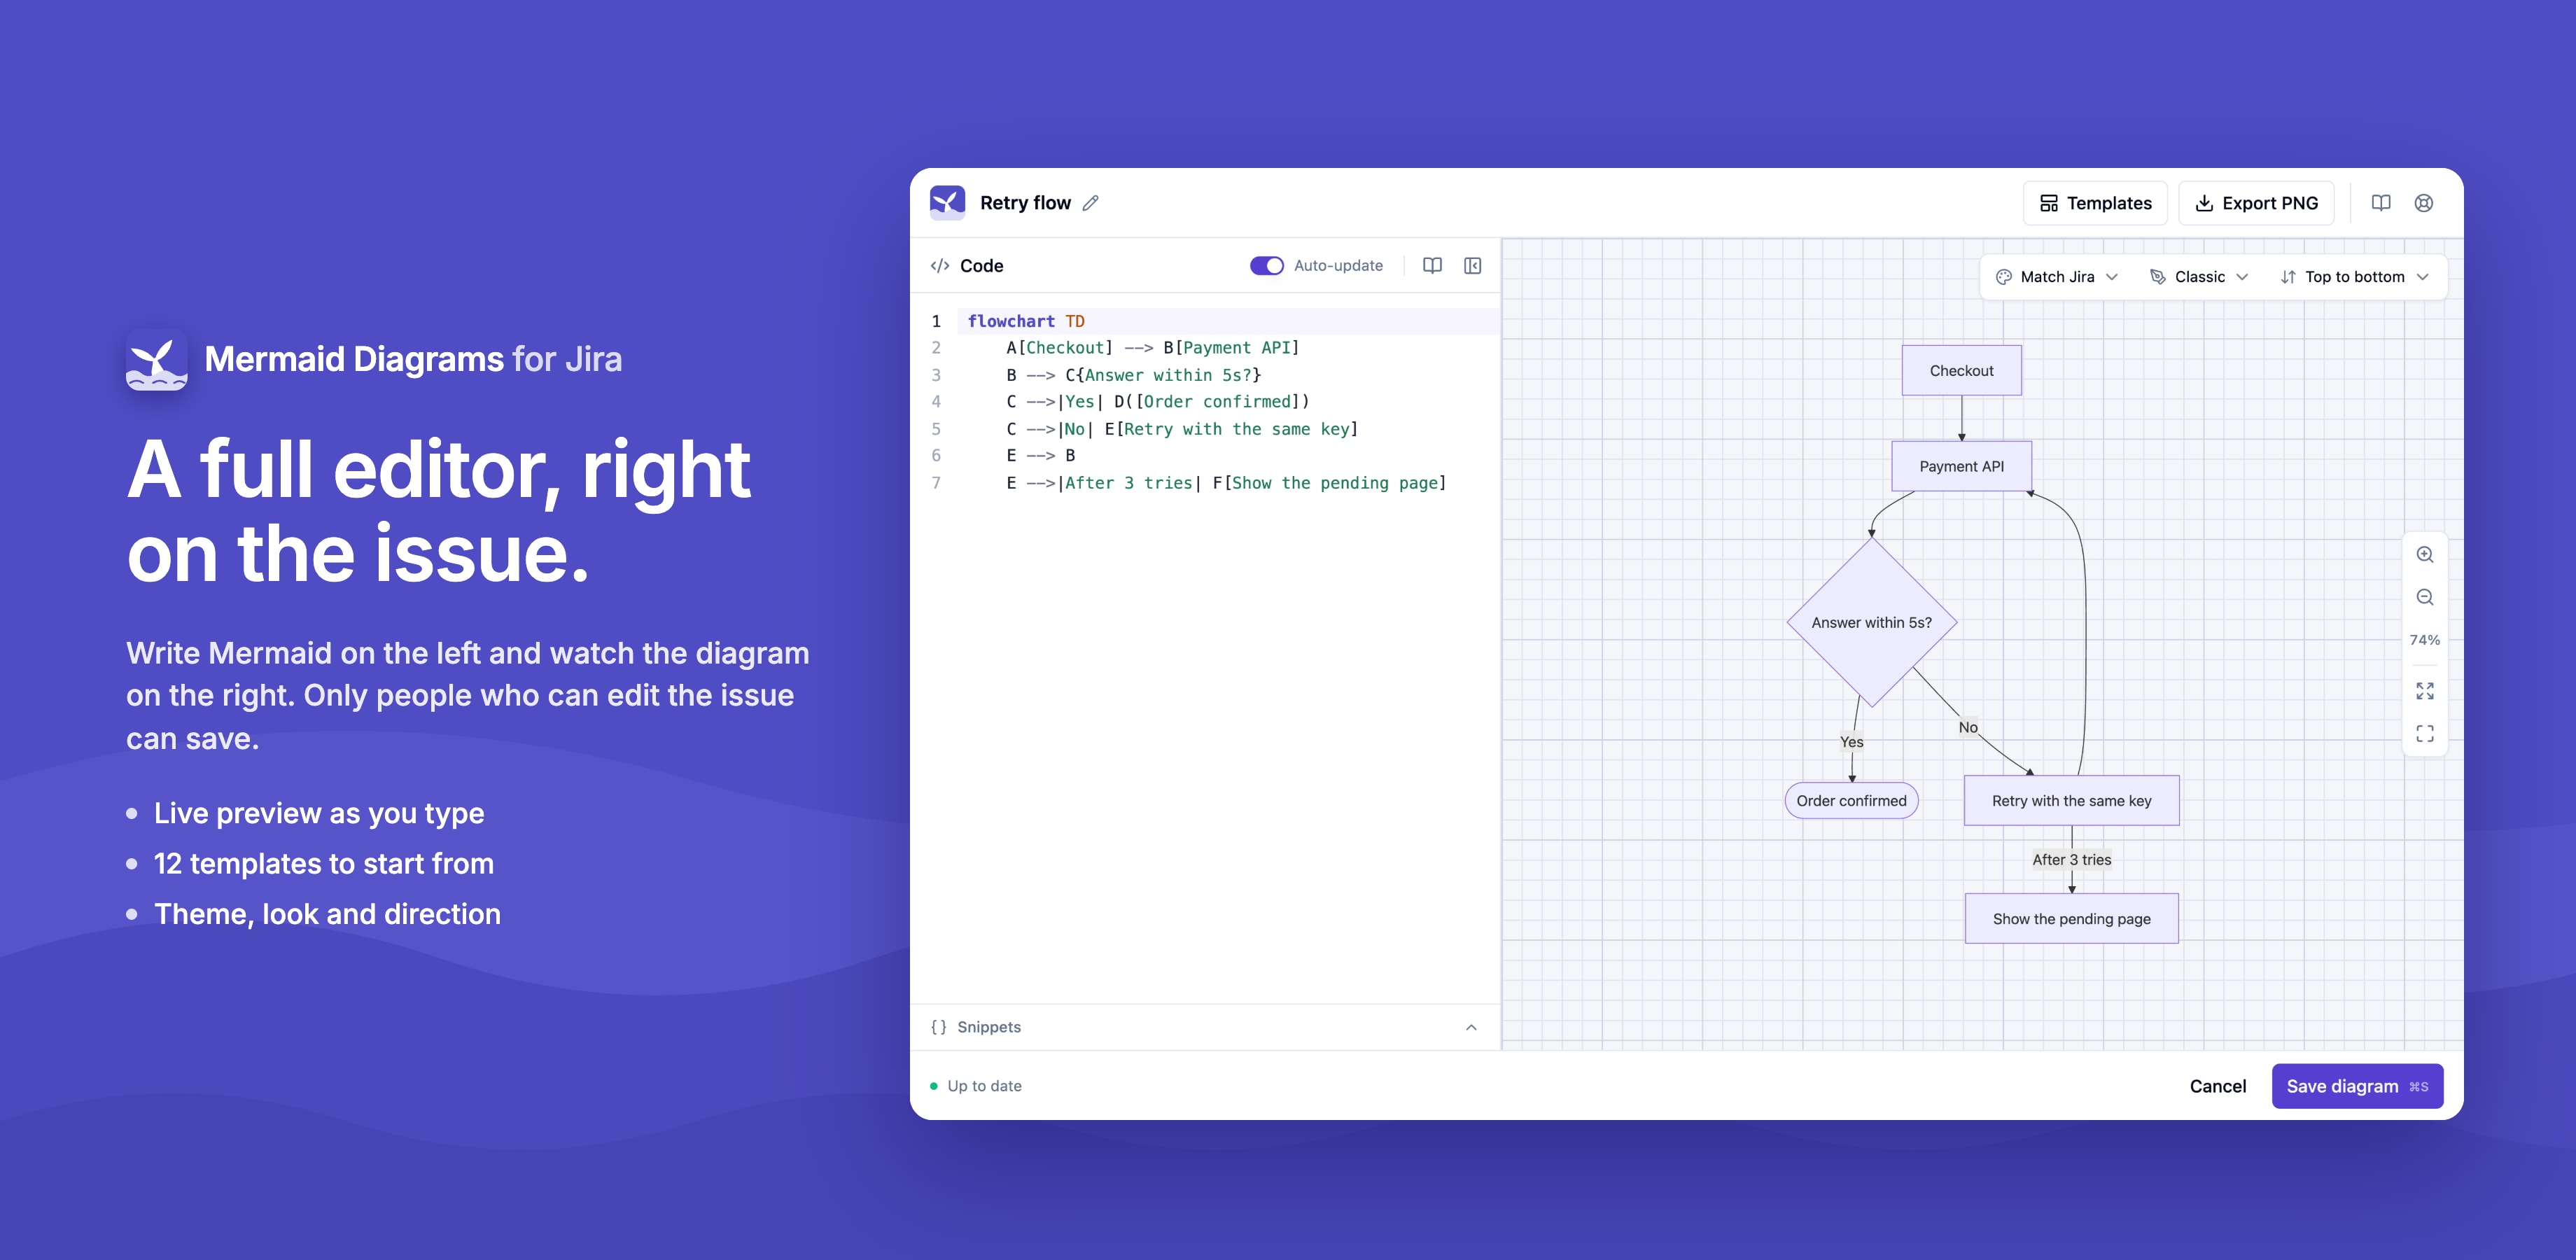
The editor opens in a modal:
- from + in the Mermaid diagrams section, for a new diagram;
- from the issue's ••• menu → Add Mermaid diagram, for a new diagram;
- from Edit in a saved diagram's toolbar.
Writing
- The code is on the left, with syntax highlighting. The diagram on the right updates as you type; turn off Auto-update for very large diagrams and press ⌘Enter / Ctrl+Enter to update.
- Templates has 12 starting points: flowchart, sequence, class, state, entity relationship, Gantt, pie chart, mind map, timeline, user journey, Git graph and quadrant.
- Snippets, below the code, insert common pieces of syntax.
- Syntax errors show under the preview, while the last good diagram stays on screen.
Options
The toolbar above the preview sets options that are saved with the diagram:
| Option | Choices |
|---|---|
| Theme | Match Jira, Mermaid's Default, Neutral, Forest, Dark and Base, and your site's colour themes |
| Look | Classic or Hand-drawn |
| Direction (flowcharts) | Top to bottom, left to right, bottom to top, right to left |
Zoom
Pan by dragging, and zoom with the buttons or ⌘/Ctrl + scroll. If you set the zoom yourself, it's saved with the diagram: the issue draws the diagram at that size, and the editor opens at it next time. Click Fit to screen before saving to go back to fitting the column.
Saving
Give the diagram a title and click Save diagram, or press ⌘S / Ctrl+S. You need permission to edit the issue; without it the editor tells you, and Save is off.
An issue can have up to 20 saved diagrams, which together must fit Jira's 32 KB limit for one issue property. If a save would go over it, the editor says so.