This guide walks you through exporting your first Confluence page tree to Markdown in just a few steps.
Navigate to any Confluence page, click the ••• (More actions) menu in the top-right corner, and select Export to Markdown.
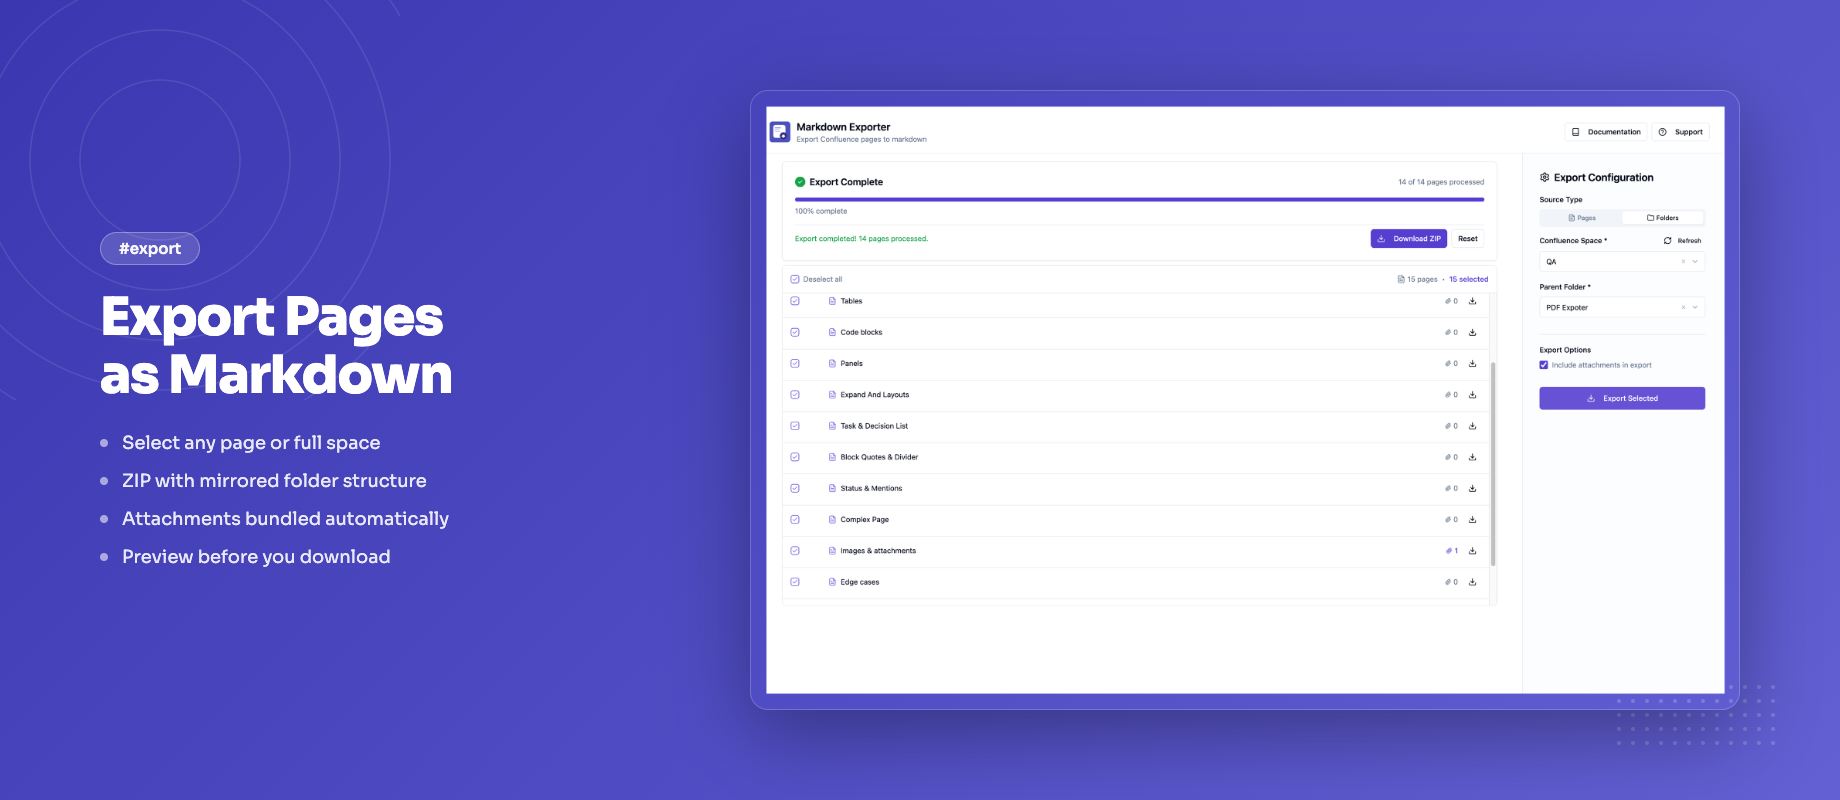
The exporter opens as a full-page app. The left panel shows the page tree starting from the page you launched from. The right panel contains the export configuration.
The page tree shows all pages and child pages under your selected parent. Use the checkboxes to select which pages to export.
In the right-hand panel, configure the export to your needs:
| Option | What it does |
|---|---|
| Include attachments | Downloads and packages attachments in the ZIP |
| Add YAML front matter | Prepends metadata to each exported file |
| Filename pattern | Controls how each .md file is named |
| Obsidian mode | Converts internal links to [[wikilink]] format |
| Panel / Callout style | How Confluence info panels are rendered |
For a first export, the defaults work well — just leave everything as-is.
Click Export Selected at the bottom of the right panel. A progress bar shows each page being processed.
When complete, your browser downloads a ZIP file containing .md files in a folder structure mirroring your Confluence page hierarchy, plus an attachments/ folder if attachments were included.
Open the ZIP and you'll find clean Markdown files ready to use in any editor, static site generator, or tool like Obsidian.